Putting a coffee machine on the kitchen counter does not create a coffee bar. A coffee bar exists only once a small area is organised so the same routine can be repeated every morning without friction: the beans are within reach, the grinding and brewing surfaces are clear, the tools you touch daily sit where your hands expect them, everything else has a home, and cleanup has somewhere to happen.
That makes this a planning problem long before it is a shopping problem. A useful home coffee bar is built around six decisions — the brewing method you actually use, a location that supports it, the real space the equipment occupies while it is working, the sequence of the workflow, the storage that keeps clutter off the counter, and a plan for cleanup. Get those right and the equipment question largely answers itself.
Everything below is a decision guide rather than a shopping list. Where a specific tool genuinely solves a step in the workflow, it is named with its core specifications, and every mention links straight to its section in our Home Coffee Bar Setup & Upgrades collection, where the full specifications, regional models and current price snapshots are documented.
⚡Quick Comparison MatrixClick to ExpandAt a Glance: Which Coffee Bar Fits Your Routine
Expand TableCollapse Table
At a Glance: Which Coffee Bar Fits Your Routine
| Setup type | What has to stay on the counter | Counter demand | What can move into storage | Where it usually works best |
|---|---|---|---|---|
| Simple everyday (drip, French press, pods) | Coffee maker, bean storage, one mug | Lowest | Filters, pods, spare cups, cleaning supplies | Kitchen counter, cabinet, sideboard, console |
| Pour-over | Brewer, gooseneck kettle, scale, bean storage | Moderate, plus a sink nearby | Server, spare filters, carafe | Counter beside the sink and a socket |
| Espresso | Machine, grinder, scale, tamper, dosing funnel | Highest, plus clearance above the machine | WDT tool, spare baskets, pitcher when not in use | Dedicated counter, sideboard or rolling cart |
Prices and availability for the products referenced below are recorded in the same collection and are subject to change.
1. Start With Your Coffee Routine, Not the Decor
Before buying anything, describe your normal morning out loud. Not the drinks you make when guests visit — the one you actually make on a Tuesday when you are running late. That single answer determines the tool list, the counter width and how the station should be arranged.
Espresso-Focused
An espresso routine is tool-intensive and strictly sequential:
beans → grinder → dose → distribute → tamp → brew → steam → serve → knock out → clean
That sequence needs an espresso machine, a grinder, a 0.1g scale, a correctly sized tamper, a dosing funnel, a milk pitcher if you drink milk drinks, somewhere to dispose of spent pucks, and cleaning supplies. Distribution tools and puck screens are optional refinements rather than day-one requirements.
This article deliberately does not repeat the espresso equipment logic step by step, because a dedicated guide already owns that decision: our complete guide to building a home espresso setup walks the same workflow stage by stage, and how to arrange an espresso station covers the placement questions that come with it.
One planning option is worth flagging here, because it changes the layout rather than the tools. A machine that consolidates several brewing methods removes a whole second appliance from the counter: the Ninja Luxe Café Premier 3-in-1 espresso machine combines espresso, drip and cold brew in one chassis with a built-in 25-setting conical burr grinder, a Barista Assist system that weighs the dose and assists the tamp, and a four-mode milk frother. For a household that would otherwise run an espresso machine and a drip machine side by side, that consolidation is a space decision as much as a coffee decision.
Pour-Over-Focused
Pour-over asks for far fewer tools but a different spatial arrangement:
beans → grind → filter → kettle → brew → serve → clean
The core list is a grinder, a gooseneck kettle, a brewer, a scale, a server and bean storage. There is no tamper, no dosing funnel and no knock box, so a pour-over station can be narrower — but it wants to sit close to the sink for rinsing and it needs a free socket for the kettle.
Two tools do most of the work in this layout. Temperature control matters more than pouring style, which is why the Cosori gooseneck electric kettle pairs a narrow, curved spout with adjustable temperature and a 0.8-litre capacity in 304 stainless steel — enough for two large cups without reboiling. The brewer itself is the other half: the Bodum pour over coffee maker uses a borosilicate glass carafe with a reusable stainless steel mesh filter and a cork grip, so there is no paper filter to run out of and the brew is taste-neutral from one morning to the next.
Simple Everyday Coffee
If your routine is a drip machine, a French press or a capsule brewer, you do not need a barista station at all — and adding espresso-specific tools to a casual routine creates clutter rather than capability. The practical list is short: a brewer, fresh coffee with somewhere sensible to store it, mugs, filters or pods, a basic way to measure, and a cleanup plan.
Consolidation helps here too. The Ninja Dual-Brew / Prestige 2-in-1 coffee maker puts a full-carafe drip brewer and a single-serve capsule side into one body, with ten programmable drink sizes and a fold-away milk frother, which is what most households actually need when weekday speed and weekend volume pull in opposite directions. If the objection to pods is the waste rather than the convenience, the Savepod PodMaker reusable pod system replaces disposable capsules with 100% compostable paper filters and a universal snap-lock ring, so you can use your own freshly ground beans in a standard single-serve brewer.
The principle is the same in all three cases: buy around the routine you actually use, not the routine you admire.
2. Choose the Right Location for Your Coffee Bar
Location is a workflow decision disguised as a decorating decision. Before choosing a surface, check that it has three things within reach: water, power and a place for the waste.
Kitchen Countertop
The default for a reason. It is already near water and usually near a socket, cleanup is a few steps away, and the routine happens where the household already is. The trade-off is competition with food preparation, which is why the countertop station needs to be generous in width but disciplined in contents.
Kitchen Cabinet or Built-In Niche
Best when the priority is hiding appliances and keeping the visual line of the kitchen clean. A niche gives you integrated storage underneath and a defined boundary for the station, which makes it much harder for coffee equipment to spread. Check overhead clearance before committing, because a top-loading machine or a tall grinder hopper needs room to open.
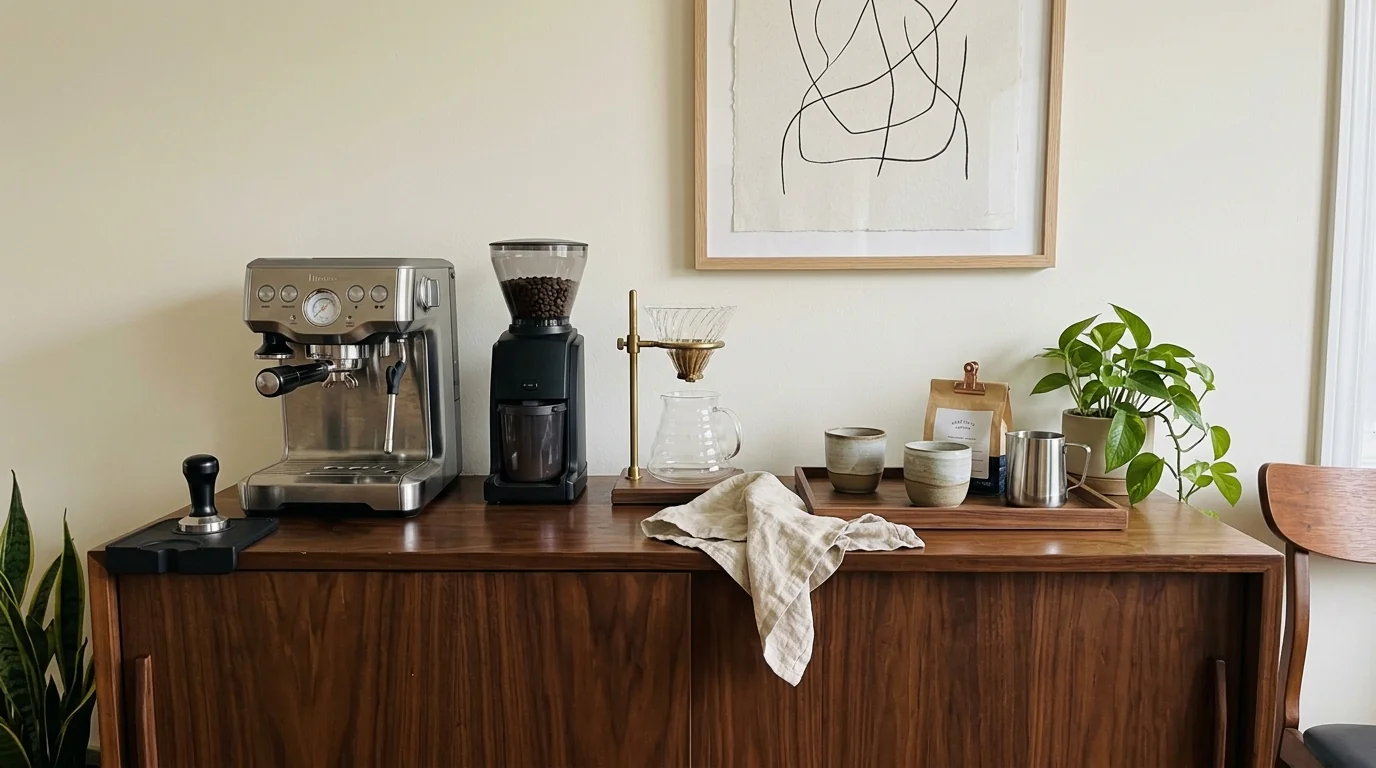
Sideboard or Console
A practical answer when the kitchen counter is full but the room is not. A sideboard gives you a working surface plus drawers directly below it, which is exactly the ratio a coffee station wants. The cost is distance from the sink, so plan for a small rinse container or a cloth-and-tray routine.
Rolling Cart
The most flexible option, and the best one for renters. A cart can be wheeled out for morning service and back against the wall afterwards, which effectively rents you counter space you do not own. It also sidesteps the renovation question entirely.
Dining Room or Living Room
Reasonable when the kitchen is crowded, when coffee is served socially rather than individually, or when an unused console is already sitting in the room. The constraint is that everything involving water and washing up has to be planned around a trip to the kitchen.
Pantry or Dedicated Coffee Nook
The most comfortable option if the space exists, because it can be designed end to end: storage below, shelving above, waste and cleaning supplies in one place. It is rarely available in apartments, but where it is, a nook beats a countertop on almost every dimension except convenience.
The rule that separates a good decision from a photogenic one: choose the location based on the workflow it enables, not only on how it looks. Kitchen counters, niches, sideboards, carts and narrow consoles are all viable; the one that wins is the one where your hands can reach water, power and waste without leaving the station.
3. Measure Your Space Before Buying Anything
There is no universal "correct" coffee bar size, and any article that hands you a single number is ignoring how differently machines are built. The correct principle is narrower and more useful: measure each appliance in its actual operating position, not just its retail footprint.
Width
Measure the total linear counter space you are prepared to give the station, then subtract the width of everything that must stand on it: the machine, the grinder, the kettle, the scale, the puck waste container and any storage that stays out. If the remainder is under the width of a mug laid on its side, the station is already too tight to work in.
Depth
Measure the footprint of the deepest appliance, then check what is left in front of it. Coffee work happens in that front strip — filling a basket, weighing a dose, setting down a pitcher — and a station with no landing room forces every action to happen over the sink or in mid-air.
Height
Check the clearances you will operate on, not the ones on the spec sheet: upper cabinets, bean hopper, water reservoir lid, machine top, and any shelf or vertical organiser above. If refilling the tank or loading beans means sliding a full machine forward every morning, the height is wrong.
Power
Identify where the socket is, how the cord will route, and whether several appliances will be running at once. A kettle, a grinder and an espresso machine on one circuit is worth thinking about before the layout is fixed rather than after.
Water
Consider how you will fill the reservoir and the kettle. Proximity to a sink is the single most underrated factor in daily satisfaction with a station, because it determines how annoying the second half of the routine is.
Cleanup
Decide where the waste goes — spent pucks, grounds, used filters — and where the cloth, drip tray and rinsing water live. A station with no cleanup answer becomes a station with coffee grounds on it.
Footprint data is what turns these checks into a layout. The Maestri House S2 espresso coffee scale measures 4.13 × 4.13 × 0.78 inches and weighs 0.75 lb, which is small enough to live permanently on a drip tray instead of consuming its own patch of counter. A 350 ml milk pitcher takes a fraction of the depth of a commercial jug. And a 22 oz bean canister is a defined, upright cylinder rather than a bag that flops across the work surface. None of those numbers is a rule; together they are what you compare against your own measurements.
4. Design the Coffee Bar Around Workflow
The most useful mental model for a coffee bar is a small production line. Each item sits where it is used, and the distance between steps is as short as the room allows.
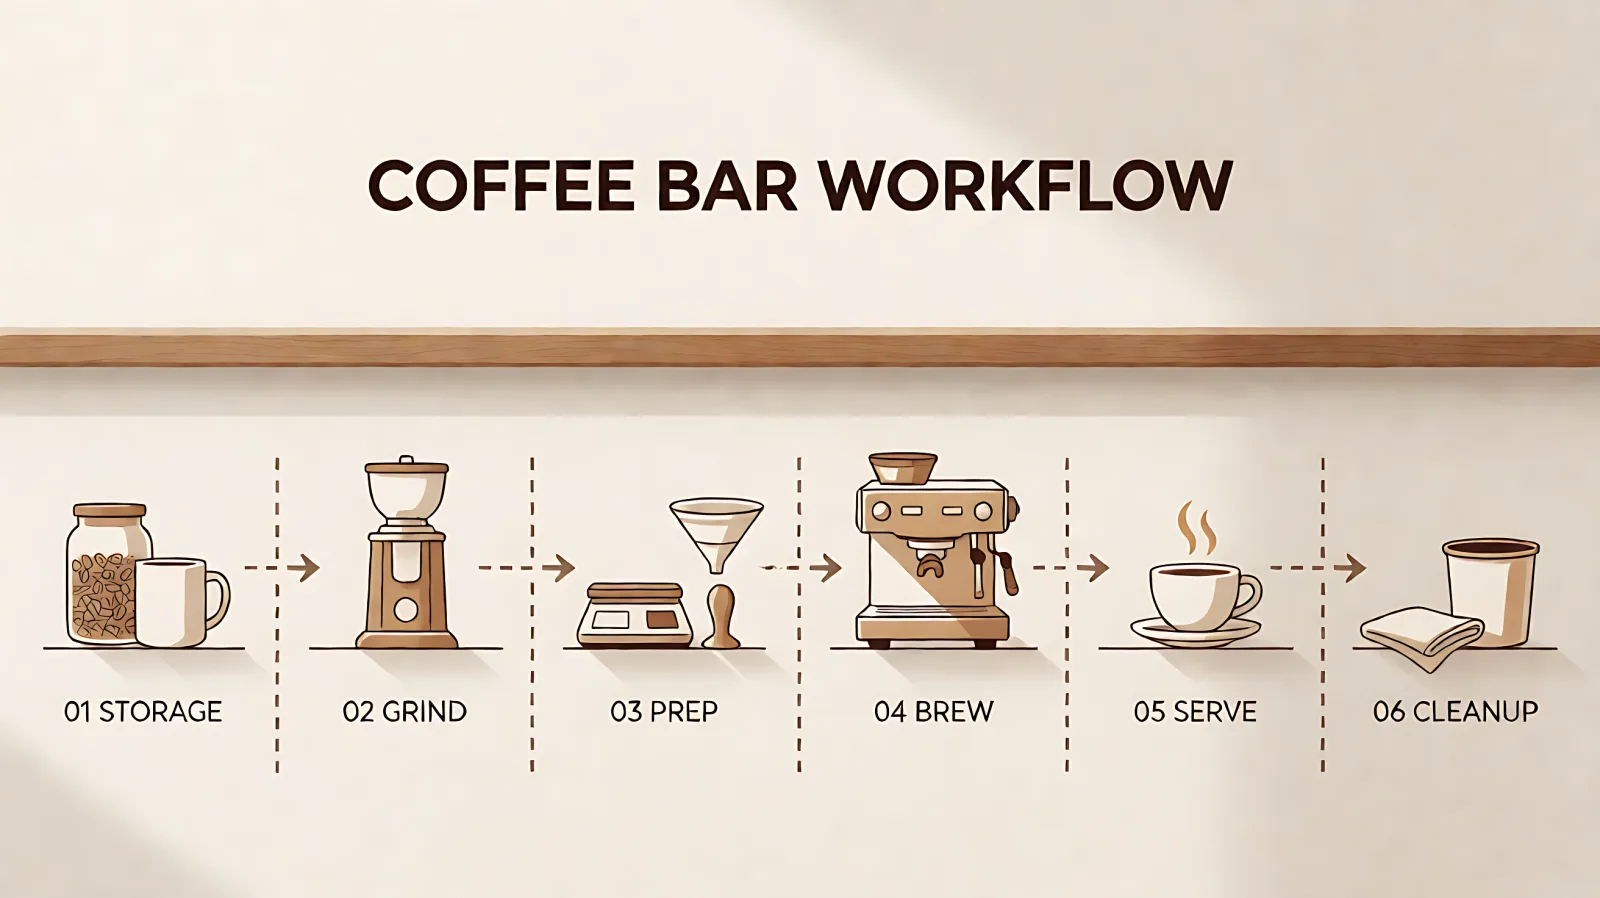
A practical sequence looks like this:
Storage → Grind → Prep → Brew → Serve → Cleanup
For espresso, the same line becomes:
Beans → Grinder → Prep → Espresso machine → Milk → Serve → Knock and clean
For pour-over:
Beans → Grinder → Kettle → Brewer → Server → Cleanup
The point of writing the sequence down is that it tells you what must be adjacent, and adjacency is what a good layout is. Frequently used equipment should be physically close together; anything that interrupts the sequence — a cupboard door that must be opened mid-shot, a drawer three steps away, a bin across the kitchen — is a friction point you will feel every single morning.
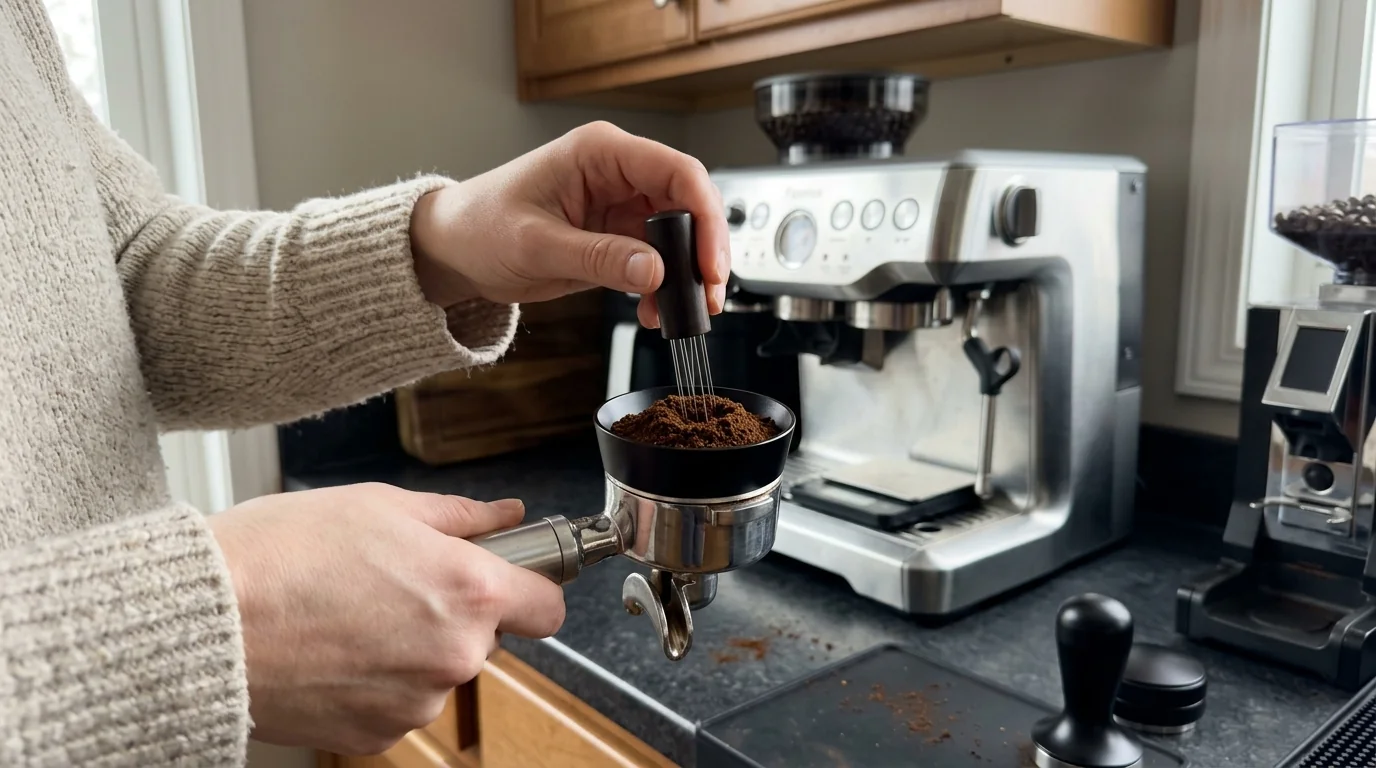
Three details do most of the work in an espresso arrangement. The first is intercepting the mess where it is created: the Normcore 54 mm magnetic dosing funnel is an 18 mm anodised aluminium collar held on the basket by eight neodymium magnets, so a full dose can be ground, stirred and settled without grounds escaping over the rim. The second is evening out the bed before tamping: the Nessus WDT espresso distribution tool uses ten 0.35 mm food-grade needles and a configurable head to break up clumps that would otherwise channel water down one side of the puck. The third is where the spent puck goes: a countertop knock box with a rubberised strike bar keeps the waste in one place beside the machine instead of sending you across the kitchen holding a hot, wet portafilter.
There is no universal left-to-right layout, and no requirement that the sequence run in a straight line. A corner station might fold the line in two; a cart might stack storage below and workflow above. What matters is that you can map your own routine onto the surface without backtracking.
5. Decide What Actually Belongs on the Counter
Once the workflow is clear, the counter question becomes easy to answer by sorting every item into three groups.
Keep on the counter — things used almost every day: the primary coffee machine, the grinder, the kettle if it is used daily, the scale if it is used daily, and one or two essential tools.
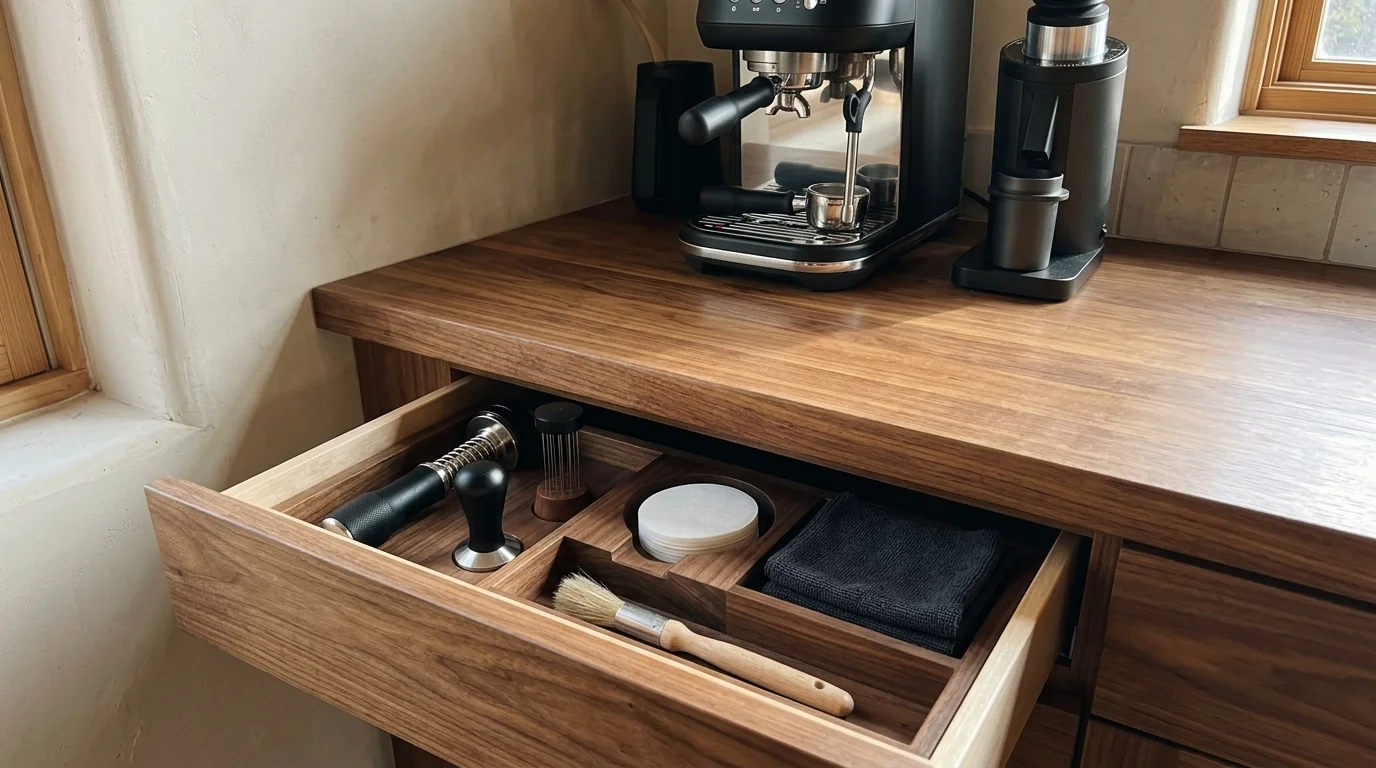
Keep nearby — things used regularly but not constantly: filters, dosing tools, the milk pitcher, the knock box, the current bag of coffee, and cleaning supplies. These belong in a drawer, on a shelf or in a small organiser within arm's reach, not in the working strip.
Store away — rarely used items, duplicates, seasonal equipment, bulk supplies and anything that exists mainly to be looked at. Pantry or upper cabinets.
The rule underneath the three groups is the one that keeps a station usable: every item on the primary counter should earn its footprint. If something has not been touched in a fortnight, it is occupying space that the actual workflow needs.
This is also where most accessory decisions get easier. A tool is worth adding when it removes a specific friction you already have — and not before. Our companion verdict guide sorts that question product by product in the one-line verdict for every coffee gadget, which is a faster way to decide than reading another list of essentials.
6. Plan Storage Before You Decorate
Storage is discussed here as a workflow function, not as a shopper's category, because the two are often confused. There is display storage — open shelving, trays, tiered stands — which exists to be seen, and working storage — drawers, deep cabinets, lidded containers — which exists to be opened with one hand while the other holds a portafilter.
Both have a place, but only one of them should occupy the working strip. The practical toolkit is mundane: a drawer for tools that would otherwise migrate across the counter, a shelf for mugs, a tray that defines the boundary of the station, a container for beans, a place for filters, and vertical storage where horizontal space has run out. Note the difference between a decorative organiser and a functional one: the useful version is sized to the objects you actually own, and the decorative version is sized to a photograph.
Bean storage is the one part of this worth treating properly, because it is the only item in the station that visibly degrades. Oxygen, moisture, heat and light all stale coffee, and a plastic clip on an open bag slows none of them. The Veken airtight coffee canister is a 22 oz 304 stainless steel body with a one-way CO2 release valve, a clear viewing window and a date tracker dial on the lid, so freshly roasted beans can vent without the lid being pushed open and you can see both the remaining level and the roast date without breaking the seal. The honest caveat is worth repeating: no canister keeps coffee fresh indefinitely, and whole beans are best used within three to five weeks of their roast date. Buy the size that matches how much you actually drink, because a half-empty large container is mostly air.
For the full working-storage and equipment picture, including how the tools that support it are chosen, our Home Coffee Bar Setup & Upgrades collection covers it end to end.
7. Small-Space Coffee Bar Ideas
A small kitchen does not rule out a real coffee bar; it rules out a wide one. The adjustment is to build upward and to keep the working surface ruthlessly clear.
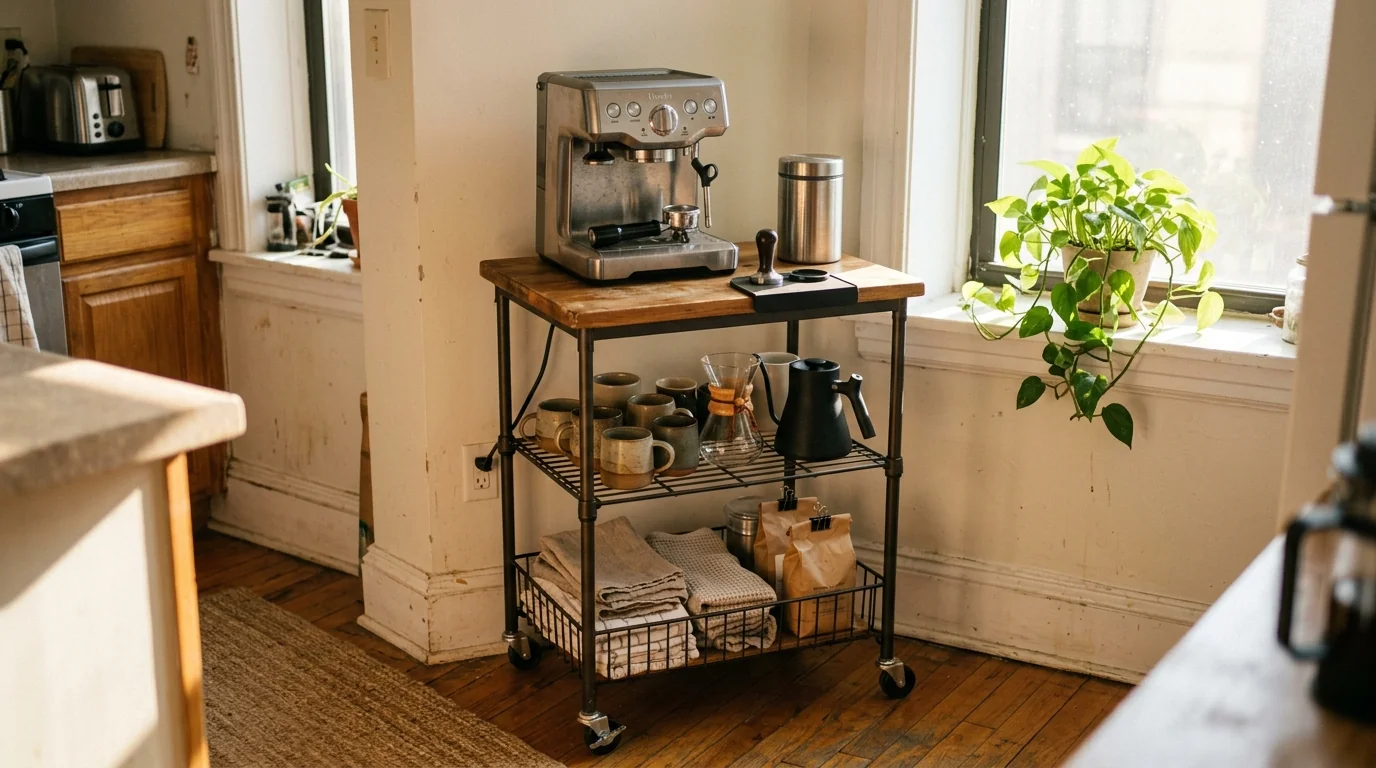
Small Kitchen Counter
Keep the machine and the grinder tight together and let the rest of the station live above or beside them. This is where compact equipment pays for itself: a 4.13-inch square scale or a 350 ml pitcher leaves usable space that a full-size alternative would consume. Everything that is not touched daily moves off the surface entirely.
Coffee Cart
A narrow three-tier trolley gives you working space on top and storage underneath in the same footprint, and it can be rolled out of the way when the kitchen is needed for something else. For renters, it is usually the best answer in the room.
Wall Shelves
Useful for mugs, filters, beans and small accessories, and they remove an entire category of clutter from the counter. The warning is specific: shelves should never interfere with appliance operation. A shelf that blocks a bean hopper, a water tank lid or the arc of a steam wand has solved a storage problem by creating a workflow problem.
Cabinet Coffee Station
The strongest option when the priority is a clean kitchen, because closing a door hides the entire station. It works best when the cabinet has power nearby and enough internal height for the machine plus its hopper.
Corner Station
Corners are usually wasted. A corner shelf or a small dedicated unit converts dead space into a station, and the two-sided geometry works well for appliance-plus-prep arrangements.
Narrow Console Outside the Kitchen
When the kitchen genuinely has nothing left to give, a slim console in a hallway, dining area or living room can carry the station instead. It is a deliberate trade — you give up sink proximity — but it is often the difference between a coffee bar and no coffee bar.
Rental-Friendly Setup
Avoid anything permanent. Carts, consoles, freestanding shelves and countertop trays all leave the room as they found it, which matters more than most buying guides admit.
8. Build a Coffee Bar at Different Budget Levels
The order in which you spend matters more than the total. Spending the entire budget on the visible machine and nothing on the rest of the workflow produces a beautiful station that still cannot make a repeatable cup.
Basic
Prioritise, in this order: a brewing device, a grinder if your method requires one, fresh coffee, a mug, and simple storage. At this level the goal is a working routine, not a complete station.
Intermediate
Add the things that create consistency: a better grinder, a 0.1g scale, dedicated storage for beans and filters, and the one or two accessories that remove friction you have actually experienced. This is the stage where a station starts to feel effortless.
Advanced
Add only when the workflow justifies it: an upgraded machine, a higher-end grinder, water treatment, specialised accessories, dedicated furniture and improved storage. These are refinements, and they are much easier to judge once the basics are stable.
The specific products and price snapshots for each level are documented in the collection rather than repeated here — see the collection's closing buying guide for the item-by-item version of this decision order.
9. What You Probably Don't Need on Day One
Most coffee bars fail by addition rather than omission. The following are consistently bought earlier than they are needed.
- Too many accessories at once. Every extra tool is another variable to learn before the basics are stable.
- Duplicate tools. Two tampers, two pitchers or two scales do not improve a routine; they just fill a drawer.
- Decorative storage before functional storage. A tray is not a storage plan.
- Espresso-specific tools for non-espresso drinkers. Dosing funnels and WDT tools do nothing in a pour-over or pod routine.
- Oversized containers. A big bean canister that sits half empty holds a lot of air and defeats its own purpose.
- Excessive mugs. Mug storage is real storage, and it competes with the working surface.
- Gadgets that solve no actual problem. If you cannot name the friction, there is no friction to remove.
A specific warning applies to the two most over-recommended espresso add-ons. A WDT tool is a genuine improvement when distribution is your bottleneck, and a waste of motion when you are still learning dose, grind and a level tamp. A puck screen is worth buying for cleanliness, because it keeps grounds out of the group head, but it is not an extraction upgrade and will not rescue an uneven grind. Both are covered at length in the gadgets that solve problems you do not have yet, which is the more honest place to start if you are weighing a purchase.
10. Common Home Coffee Bar Mistakes
- Buying equipment before measuring the space. The most expensive mistake, because it is discovered after the return window.
- Putting everything on the countertop. If storage was never planned, the working surface becomes the storage.
- Ignoring power requirements. Cords, socket positions and simultaneous loads get discovered on the first morning, not in the shop.
- Forgetting machine clearance. A top-loading tank under a fixed shelf turns a two-second refill into a two-minute shuffle.
- No dedicated cleanup area. Spent grounds, cloths and drip trays need a home, or they end up spread across the station.
- A layout that ignores the workflow. Tools placed by symmetry rather than by sequence force backtracking on every drink.
- Too much decorative storage. Display pieces consume the same counter as working tools and return less value.
- Buying accessories before choosing the brewing method. The fastest way to own a drawer of tools you never use.
- No plan for frequently used versus rarely used tools. Without three storage layers, the working strip fills up within a month.
- Designing for photographs instead of daily use. A station that looks perfect and has nowhere to set down a pitcher has failed at its only job.
11. How to Upgrade Your Coffee Bar Over Time
A coffee bar is built in phases, and the order is not arbitrary.
Phase 1 — Get the core brewing method working. One reliable way to make the coffee you drink most, with a grinder that supports it.
Phase 2 — Improve consistency. Add measurement and preparation so that a good cup becomes a repeatable cup. For espresso, that means a 0.1g scale and a tamper that fits.
Phase 3 — Improve workflow. Remove the friction you now understand: the mess, the reaching, the interruptions. This is where a dosing funnel, a knock box or a better layout earns its place.
Phase 4 — Improve storage. Now that you know what you actually use, give it a permanent home and move everything else out of the working strip.
Phase 5 — Improve aesthetics. Only once the station functions well. Treated in this order, decoration is the last ten percent rather than a replacement for planning.
If you prefer a concrete sequence, our five-stage buying priority ladder applies the same logic accessory by accessory, and the espresso build order applies it to the espresso workflow specifically.
A home coffee bar is not a display, and it is not a shopping list. It is a small area of your kitchen organised around a routine you already have. Decide the routine, choose a location that supports it, measure before you buy, keep the working surface clear, give everything else a home, and plan the cleanup. Do that and the station stays usable on a Monday morning — which is the only test that counts.
When you are ready to choose specific tools, our Home Coffee Bar Setup & Upgrades collection documents the equipment, regional models and current price snapshots in detail, and our guide to coffee gadgets that are actually useful gives each of them a verdict before you spend.
Frequently Asked Questions
What should a home coffee bar include?
At minimum: a brewing device for the method you use, a grinder if your method needs one, fresh coffee with proper storage, a mug, and a way to measure. Espresso adds a scale, a correctly sized tamper and somewhere to dispose of spent pucks. Everything beyond that depends on what you actually drink.
How much space do you need for a coffee station?
There is no single required footprint. Measure the equipment you actually use, then leave enough clear working space for grinding, brewing, serving and cleanup. An espresso setup generally needs more counter than a drip or pour-over station because it adds a grinder, prep tools and spent-puck handling.
Where is the best place to put a coffee station?
The place with water, power and a waste answer within reach. A kitchen counter beside the sink is the usual winner. A sideboard, a rolling cart, a cabinet niche or a narrow console outside the kitchen are all good alternatives when the main counter is full.
How do you organize a small coffee station?
Build upward and keep the working surface clear. Group the machine and grinder tightly, use wall shelves or a tiered organiser for mugs, filters and beans, move rarely used items into a drawer, and choose compact equipment so the station consumes less width overall.
What should stay on a coffee bar countertop?
Only what you touch almost every day: the machine, the grinder, the kettle or the scale if used daily, and one or two essential tools. Filters, pitchers, knock boxes and the current bag of coffee belong within reach but off the working strip; bulk supplies and spares belong in a cabinet or pantry.
How do you build a coffee station in a small kitchen?
Treat it as a vertical project rather than a horizontal one. Keep the machine and grinder adjacent, use shelves or a cart for everything else, define the boundary with a slim tray if it helps, and accept that a compact scale or a 350 ml pitcher buys you more usable counter than another storage box.
Is a coffee cart better than a countertop coffee station?
They solve different problems. A cart is better when counter space is scarce or you rent and cannot modify the kitchen, because it provides storage underneath and can be moved out of the way. A countertop station is better when you already have a clear surface beside the sink, because the workflow is shorter.
What equipment do you need for a home coffee bar?
It depends on the brewing method. Espresso needs a machine, grinder, scale, tamper and dosing funnel, plus a pitcher for milk drinks and something for spent pucks. Pour-over needs a grinder, gooseneck kettle, brewer, scale and server. Drip, French press and pod routines need far less.
Where to Go Next
Once your counter layout and storage tiers are planned, explore our companion guides to equip your station and master your brew:
- Need the right gear and appliances? See our complete roundup of Home Coffee Bar Setup: 13 Essential Tools & Machines for Cafe-Quality Coffee, featuring regional model recommendations and detailed specifications.
- Dialing in an espresso routine? Follow our step-by-step workflow guide on How to Build an Espresso Setup: What You Actually Need for a Smooth Home Workflow to dial in grind, tamping, and extraction.
- Sorting through trendy accessories? Read Coffee Gadgets That Are Actually Useful: What to Buy and What to Skip to see which tools genuinely improve flavor and which ones just add clutter.